Wood fencing is one of the most commonly used fence styles to date. Ultimately, with a wooden fence comes the possibility of wear from the elements. Because of this wear, it’s likely the beautiful color your fence started out with will start to look less vibrant over time.
Staining your fence can lengthen its life and also revitalize or change its original color. Whatever your reason for wanting to stain or re-stain your wooden fence, it’s pretty simple to do at home. But before we get into the hands-on portion, let’s learn a bit about stain so we can better understand what we’re working with.
What Is Stain?
Stain is a composition of three main ingredients. Pigment, solvent, and binder are combined to create stain, much like paint. Stain contains dyes or pigments. There are slight differences between dyes and pigments, but it mostly boils down to the size of the particles and their ability to be dissolved. Dyes have smaller molecules and will actually dissolve in the liquid, whereas pigments have larger molecules and therefore are temporarily suspended in the liquid. This means that the opacity of the stain depends upon whether it contains dye or pigment.
Pigments create stains that are called “solid” stains. These could also be referred to as “opaque” stains. Opaque stains typically cover most, if not all, of the wood grain. Dye stains are considered to be transparent, so the wood grains can be seen through the added color. There are also other stains called semi-solid and semi-transparent, which sit on a spectrum between opaque and transparent.
Why Stain?
There are other options out there for you if you want to change the color of your fencing, so why stain? If you were to paint your fence, it’s highly likely your painted fence would begin to crack, peel, and lose pieces of paint in only a few years. In essence, painting requires upkeep often and is likely not worth the long-term cost involved with that.
Although staining also requires upkeep, it’s only reapplied every two to five years and requires much less prep work. With staining, all you have to do to prepare your fence is power-wash it, allow it to dry, and then it’s ready to go.
What Color Should I Choose For My Fence Stain?
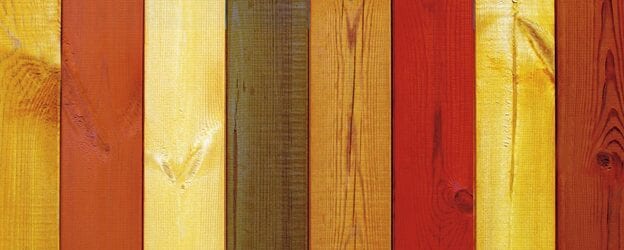
There are many different stain colors available on the market. The color of stain you choose simply depends on your own desires. The wood your fence is made of can make a difference in how the color turns out, so keep that in mind. If you’re unsure or stuck between a few color choices, it could be helpful for you to go to your local home improvement store and pick up some stain samples to try out on some excess wood so you can see what opacity and colors appeal to you.
What Will I Need to Stain a Fence?
The tools you will need for a do-it-yourself fence staining will vary depending on how you decide you would like to apply the stain. There are two options: you can either use a paint roller and paintbrush, or you can purchase a sprayer.
If painting with a brush and roller, you will need:
- Stain of your choice
- Power-washer – You can also use a scrub brush with soapy bleach water, but a power-washer would be less labor-intensive.
- Paintbrush – The type of paintbrush will vary depending on the type of stain you have. For oil-based stains, you should use a natural-bristle brush. For water-based stains, you can use a synthetic-bristle brush.
- Paint roller – This is optional but does help cover more surface area in a shorter amount of time.
- Paint tray – You can also purchase paint tray liners to make cleanup easier.
- Cardboard pieces – These will be used to help prevent stain from getting on your lawn or other items nearby that you wish to keep stain-free.
If painting with a sprayer, you will need:
- Stain of your choice
- Power-washer – To ensure the surface is clean prior to staining.
- A respirator – This ensures that you don’t inhale any fumes.
- Eye protection – This is to help protect your eyes from any stain that could be present in the air while spraying.
- A painting suit or long shirt and pants – This is to keep stain from sticking on you while spraying.
- Cardboard pieces – This is to ensure you don’t get stain in spots you don’t want it.
How to Stain a Fence Properly
Making certain your fence is clean prior to staining will ensure a more uniform stain. There are a few specific pieces of information that are valuable to ensure a great DIY stain job.
- Keep an eye on the weather forecast. This is exceptionally important. It’s best to try to stain on clear days that are low humidity and range anywhere from 50-80 degrees Fahrenheit.
- Prepare the fence. To prepare the fence, you should power-wash the entire surface you plan to stain. Power-washing the fence a few days before you intend to stain it is optimal as it gives the wood time to dry.
- Let the fence dry. If you are unsure if your fence is dry enough to be stained, you can complete a “water test.” To do this, you will drop about a quarter-size amount of water on the wood you intend to stain. If it absorbs within a few minutes, your fence is dry enough for staining. If the water forms into a bead on the wood and does not absorb in a couple of minutes, then it’s not ready for staining and should be left longer to dry. New fences can sometimes take up to 3-4 months to dry due to the boards being pressure treated. To ensure a good stain, remain patient. Greatness cannot happen overnight!
Once the water test proves your boards are dry, you can get down to the dirty work!
- Stain the fence. If you’re staining with a paintbrush and roller, then you’ll start by pouring your stain into your paint tray. Keep in mind that stain is much thinner than paint, so be careful when pouring. Once poured, you can start by saturating your brush and roller. You will then place your pieces of cardboard anywhere you do not want to stain. If only one person is staining, start with the roller and work in small sections. Once done with each section, then go in with your paintbrush and get in those nooks and crannies. You will repeat this process until your fence is completed. If you’re not satisfied with one coat, you can repeat the process until you’re happy with how the stain looks.
If you decided to use the sprayer instead, you will:
- Complete the first three steps (weather, prep, and drying).
- Read your sprayer’s instruction manual. This is necessary to ensure your sprayer is functioning as it should and to prevent unnecessary difficulty when staining.
- Fill the sprayer’s canister as directed by the manual.
- Put on your safety goggles and respirator.
- Stain the fence. You will start by laying down your cardboard to prevent staining of the lawn or other surrounding items. Once completed, you will keep your sprayer about ten inches away from the boards. You should spray with the grain of the wood. It will help to evenly distribute the stain. You will start at the bottom and then make your way up to the top of the post in one long stroke. You will then do that same process from the top to the bottom. It’s important to make sure you are overlapping your sprays so that you do not miss any portions. If you’re worried about unevenly distributing the stain, you can always spray a section with your sprayer and then use a paintbrush to go over what you had sprayed. You will continue this process until complete. Just like with the roller, if you’re unsatisfied with the color, you can always go over your fence with additional coats until you reach your desired stain level.
I Stained the Fence, Now What?
Your fence may be stained, but you may need to seal it, too. Some stains already contain sealant, so if yours does, then no more steps need to be taken and you have successfully stained your fence! If the stain does not contain sealant, then you’ll have to buy it and apply it once the stain has dried. The process to add the sealant is the same as the process to stain. Once you have sealed the fence, all you need to do is allow it to dry. With the sealing and drying complete, your fence is now successfully stained, and you are ready to show it off!
Tired of Maintaining a Wood Fence?
If you are overwhelmed or tired of maintaining a wooden fence, there are better options! Northland Fence is a reputable and credible fence company that offers those better options. Northland offers vinyl, chain link, and wrought iron fencing.
Vinyl fencing comes with a lifetime, non-prorated warranty on materials and a 5-year warranty on labor for all of our vinyl fence installations. If you are on the fence with wood, check out our vinyl selection at https://www.northlandfence.com/galleries/vinyl-fences/.
Here at Northland Fence Minnesota, we can ease your wooden fence woes. Call us today at (763) 316-4881.

FAQ
How do you prepare a fence for staining?
Preparing a fence for staining is one of the most essential steps in the process. To prepare, you can power-wash your fence with water. You can also add an anti-algae cleaner into it to ensure a thorough clean. Once completed, give your fence some time to dry. Once dry, you are ready to stain.
Is it better to spray or roll stain onto a fence?
Both options have their pros and cons. For DIY fence staining, it’s more common to roll stain on a fence due to lack of access to a sprayer. If you are able to access a sprayer and are comfortable using one, then the staining process using a sprayer would likely be much quicker than rolling.
How do you stain a wooden fence?
To stain a wooden fence, you must first prepare it. Preparations include power-washing the fence and allowing it to dry. Once dried, you can use either a sprayer or paint roller to stain your fence. With the roller, you would apply it in small sections at a time and then go over the smaller areas with a paintbrush. With a sprayer, you will fill it with stain and hold the sprayer back ten inches from the fence. You will spray in long sections from the bottom to the top of the fencepost, going with the grain of the wood, and then back down from the top to the bottom. If your fence posts are placed horizontally, then you would spray in long sections horizontally. Make sure to overlap your sections to ensure an even coating of stain.